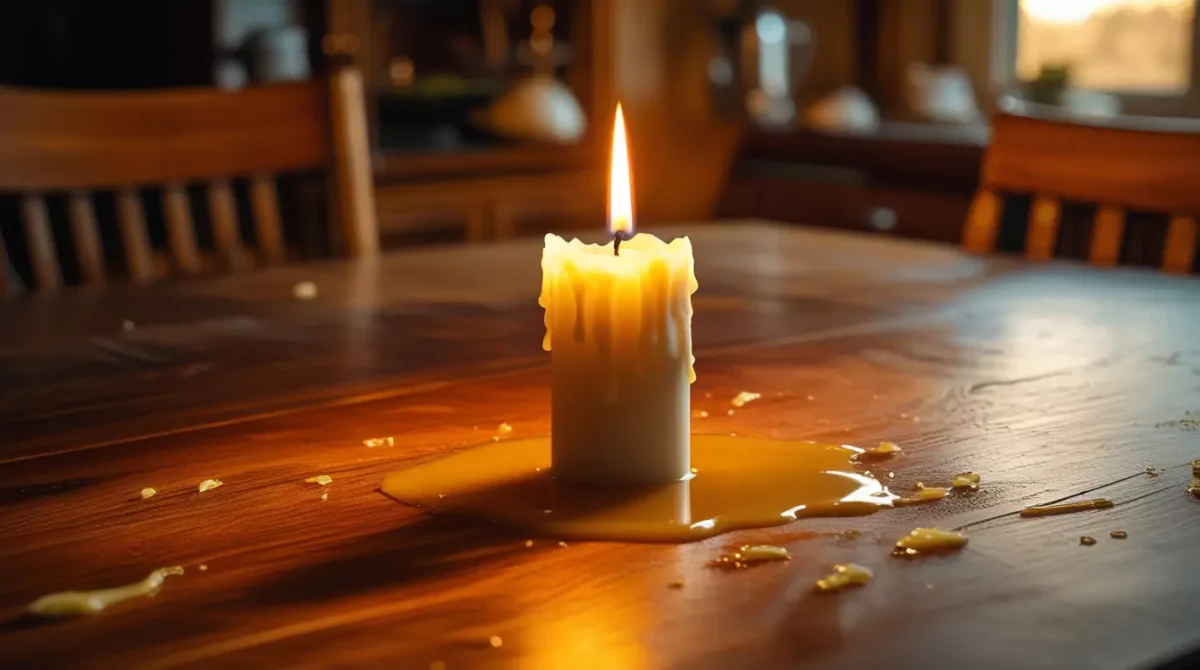
You’ve got candle wax stuck on your wooden dining table and you’re panicking.
I get it.
Last month, I watched my mate’s face turn white when her expensive pillar candle toppled over during dinner.
Hot wax everywhere.
All over her grandmother’s oak table.
Here’s what I told her (and what I’m telling you):
Don’t panic.
Don’t grab the nearest sharp object.
And definitely don’t start scraping like a maniac.
I’ve seen people ruin perfectly good furniture because they acted too fast.
The Real Problem Most People Face
Let me guess what’s running through your head right now:
“Will this damage my table permanently?”
“Should I call a professional?”
“How much is this going to cost me?”
I’ve been there.
The truth?
Most candle wax spills are completely fixable at home.
You just need to know what you’re doing.
What NOT to Do (Seriously, Don’t Do This)
Before we get to the good stuff, let me save you from making expensive mistakes:
- Don’t scrape with knives – You’ll gouge the wood
- Don’t use boiling water – Wood and extreme heat don’t mix
- Don’t rub while it’s still liquid – You’ll spread it further
- Don’t use acetone or harsh chemicals – They’ll strip your finish
I’ve seen all these “solutions” destroy beautiful tables.
Don’t be that person.


The Temperature Rule That Changes Everything
Here’s something most people don’t know:
Wax behaves completely differently at different temperatures.
When it’s hot = spreads everywhere
When it’s cold = becomes brittle and removable
When it’s room temperature = sticky nightmare
This is why timing matters.
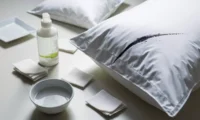
Method 1: The Ice Cube Technique (My Go-To Method)
This is what I used on my mate’s table.
It works 90% of the time.
What You’ll Need:
- Ice cubes (lots of them)
- Plastic bag or cloth
- Plastic scraper or old credit card
- Soft cloth
- Wood polish
Step-by-Step Process:
Step 1: Let it cool completely
Don’t touch anything while the wax is still warm.
I know you want to fix it immediately.
But patience saves tables.
Step 2: Apply ice
Put ice cubes in a plastic bag.
Place the bag directly on the wax.
Leave it there for 10-15 minutes.
The wax needs to get properly cold.
Not just cool – cold.
Step 3: Scrape gently
Use a plastic scraper or old credit card.
Work from the outside of the wax spot towards the centre.
The wax should come off in chunks.
If it’s not breaking off easily, apply more ice.
Step 4: Remove residue
There will be small bits left behind.
Use your fingernail or a soft cloth to get these off.
Be gentle with the wood finish.
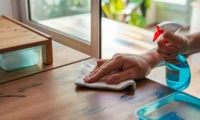
Step 5: Clean and polish
Wipe the area with a slightly damp cloth.
Then apply wood polish to restore the shine.
Method 2: The Hair Dryer Heat Method
This one’s riskier but works for stubborn wax.
What You’ll Need:
- Hair dryer
- Paper towels or cloth rags
- Plastic scraper
- Wood cleaner
The Process:
Step 1: Set up your workspace
Have paper towels ready.
You’ll need to work fast once the wax melts.
Step 2: Apply gentle heat
Use the hair dryer on medium heat.
Keep it moving – don’t focus on one spot.
Hold it about 6 inches away from the wax.
Step 3: Absorb as you go
As the wax softens, blot it up immediately.
Don’t let it spread to clean areas.
Step 4: Clean thoroughly
Once all wax is removed, clean the area properly.
Use appropriate wood cleaner for your table’s finish.
Method 3: The Iron Method (For Desperate Times)
Only use this if methods 1 and 2 don’t work.
What You’ll Need:
- Iron (on low heat)
- Brown paper bags or parchment paper
- Soft cloths
The Careful Process:
Step 1: Protect your table
Place brown paper over the wax.
Make sure the iron won’t touch the wood directly.
Step 2: Apply gentle heat
Set iron to lowest heat setting.
Press down for 10-15 seconds maximum.
Step 3: Check progress
The wax should transfer to the paper.
Replace paper and repeat if needed.
Step 4: Final cleanup
Remove any remaining residue with a soft cloth.
Polish the area to restore shine.
Different Wood Types Need Different Approaches
Not all wooden tables are the same.
Here’s what works best for each:
Oak Tables
- Ice method works brilliantly
- Oak is tough, so you can be slightly more aggressive
- Always follow wood grain when scraping
Pine or Softwood Tables
- Be extra gentle
- Use ice method only
- Avoid heat methods (they can damage soft wood)
Varnished/Lacquered Surfaces
- Ice method is safest
- Never use harsh scrapers
- Test any cleaner in a hidden spot first
Antique or Valuable Furniture
- Stop reading and call a professional
- Seriously, don’t risk it
- Some things are worth paying for
When Coloured Wax Stains Your Table
This is where things get tricky.
Coloured wax can leave stains even after removal.
For Light Stains:
- Try gentle wood cleaner first
- Baking soda paste (mix with water)
- Leave for 20 minutes, then wipe clean
For Stubborn Stains:
- Mayonnaise (I know it sounds weird)
- Spread thin layer over stain
- Leave overnight, then buff out
- The oils help lift colour from wood
For Deep Stains:
- You might need professional help
- Or learn to live with character marks
- Sometimes battle scars tell good stories

Prevention Tips (Because Nobody Wants This Again)
Learn from my mistakes:
Use candle holders with drip catchers
Always.
Every time.
No exceptions.
Keep candles away from table edges
Physics always wins.
Candles near edges will fall eventually.
Trim wicks properly
Long wicks create uneven burning.
Uneven burning creates wax drips.
Never leave candles unattended
This should be obvious.
But I’m saying it anyway.
Consider LED candles for everyday use
They look real now.
No wax, no fire, no problems.
The Products That Actually Work
I’ve tested loads of commercial wax removers.
Most are rubbish.
Here are the ones worth buying:
Goo Gone Original – Great for sticky residue
Howard Feed-N-Wax – Perfect for final polish
Simple Green All-Purpose Cleaner – Safe for most finishes
WD-40 – Surprisingly good for stubborn spots (use sparingly)
Common Mistakes I See All the Time
Mistake 1: Acting too quickly
Patience beats speed every time.
Let the wax cool completely.
Mistake 2: Using metal scrapers
Plastic works just as well.
Won’t damage your table.
Mistake 3: Forgetting to test cleaners
Always test in a hidden spot first.
What works on one finish might ruin another.
Mistake 4: Overheating the area
Too much heat can damage wood permanently.
Start gentle, increase gradually if needed.
What to Do If You’ve Already Made It Worse
Maybe you tried scraping with a knife.
Maybe you used the wrong cleaner.
Don’t panic (again).
For Small Gouges:
- Wood filler that matches your table colour
- Sand lightly once dry
- Apply matching stain and finish
For Damaged Finish:
- You might need to refinish that section
- Consider professional help for expensive pieces
- Sometimes a local carpenter can fix it cheaply
For Large Damaged Areas:
- Get quotes from furniture restoration specialists
- Compare cost to table replacement
- Learn from this expensive lesson
The Story That’ll Make You Feel Better
My neighbour once spilled an entire large candle across his dining table.
Red wax.
Everywhere.
He tried everything wrong first.
Knife scraping (gouged the wood).
Boiling water (warped the veneer).
Harsh chemicals (stripped the finish).
By the time he asked for help, the damage was extensive.
But we managed to save it.
Took three days of careful work.
Used every method I’ve mentioned here.
The table now looks better than before.
Sometimes disasters lead to improvements.
Professional Help: When It’s Worth the Cost
Call a professional if:
- Your table is worth more than £500
- It’s antique or family heirloom
- The wax covered a large area
- You’re not confident in your abilities
- You’ve already tried and made it worse
Good furniture restorers typically charge £50-150 for wax removal.
Cheaper than replacing a table.
Much cheaper than living with regret.
Tools Every Homeowner Should Have
Keep these handy for future incidents:
Plastic scrapers (pack of 5 costs £3)
Wood polish appropriate for your furniture
Soft microfibre cloths
Gentle wood cleaner
Ice cube trays (obvious reasons)
Having the right tools ready makes everything easier.
The Environmental Approach
Some people prefer eco-friendly solutions:
White vinegar and olive oil – Natural wood conditioner
Lemon juice and salt – Gentle stain remover
Coconut oil – Good for final buffing
Cornstarch – Absorbs fresh spills
These work slower than commercial products.
But they’re safer for families with kids and pets.
Frequently Asked Questions
Can I use a steamer to remove candle wax from wood?
No, don’t use a steamer on wooden furniture.
The combination of heat and moisture can damage wood and finishes.
Stick to the ice method or gentle heat from a hair dryer.
How long should I wait before trying to remove wax?
Wait until the wax is completely cool to touch.
This usually takes 30-60 minutes depending on the amount.
Rushing this step makes everything harder.
Will removing wax damage my table’s finish?
Not if you’re gentle and use proper techniques.
The ice method is safest for all finishes.
Always test cleaners in a hidden area first.
What if the wax has been there for weeks?
Old wax is actually easier to remove.
It’s harder and more brittle.
Use the ice method – it should chip off easily.
Can I prevent wax from sticking to wood in the first place?
Yes, regular waxing and polishing creates a protective barrier.
Well-maintained finishes resist staining and make cleanup easier.
Should I sand the area after removing wax?
Only if there’s visible damage or staining.
Light sanding with fine-grit paper (220+) followed by matching stain and finish.
For valuable pieces, get professional help.
What’s the difference between removing wax from painted vs natural wood?
Painted surfaces are usually easier to clean.
Natural wood requires more care to avoid damaging the grain or finish.
Use gentler methods on natural wood.
Can I use commercial wax removers on antique furniture?
Test in an inconspicuous area first.
For valuable antiques, consult a professional restorer.
The cost of professional help is usually less than the cost of damage.
Final words
Removing candle wax from wooden dining tables isn’t rocket science.
But it requires patience and the right approach.
Ice method works 90% of the time.
Heat methods work for stubborn cases.
Professional help for valuable pieces.
Prevention beats cure every time.
Your table will survive this.
You’ll have a good story to tell.
And you’ll never look at candles the same way again.
Next time someone spills wax on their wooden dining table, you’ll know exactly how to remove candle wax from wooden dining table like a pro.