Hey there, future laundry expert! 👕
Did you know that your dryer could be working super hard but still not drying your clothes properly? Or worse, it could be a fire hazard right in your home? Don’t worry – cleaning your dryer vent is easier than you think, and we’re going to learn everything about it together!
Whether you’re a student living in a hostel, helping out at home, or just curious about how things work, this guide will make you a dryer vent cleaning pro in no time!
What is a Dryer Vent? (The Basics First!)
Think of a dryer vent like the exhaust pipe of a car. Just like a car releases smoke and hot air through its exhaust, your dryer pushes out hot, moist air through a vent. This vent is usually a pipe or tube that goes from the back of your dryer to the outside of your building.
Here’s the simple version: When you dry your clothes, tiny pieces of fabric (called lint) break off. Even though there’s a lint trap inside the dryer, some lint escapes and builds up inside the vent pipe. Over time, this buildup can cause big problems!
Why Should You Care About Cleaning Your Dryer Vent?
Let me tell you a story. My friend Raj was a college student in Mumbai. He noticed his clothes were taking forever to dry – sometimes two or three cycles! His electricity bill shot up by ₹800 per month. When he finally checked the dryer vent, it was completely clogged with lint. After cleaning it, his dryer worked like magic again!
Here’s why cleaning your dryer vent matters:
1. Save Money on Electricity Bills
A clogged vent makes your dryer work extra hard. It’s like trying to breathe through a blocked nose – you need more energy to do the same work! This means higher electricity bills. For students on a budget, this can mean hundreds of rupees wasted every month.
2. Dry Your Clothes Faster
Nobody has time to wait forever for clothes to dry, especially when you have an exam tomorrow and need your favorite lucky shirt! A clean vent means faster drying time, which means more time for studying (or watching your favorite web series!).
3. Prevent Fire Hazards
This is the most important reason! Lint is highly flammable. In fact, thousands of dryer fires happen every year because of clogged vents. The accumulated lint can catch fire from the dryer’s heat. It’s scary, but completely preventable with regular cleaning.
4. Make Your Dryer Last Longer
Dryers are expensive! A clogged vent forces your dryer to work harder, which means it wears out faster. Regular cleaning can add years to your dryer’s life. Think of it as regular health checkups for your appliance!
5. Reduce Energy Consumption
For eco-conscious students, this matters! A clean dryer uses less energy, which is better for our environment. Every small step counts toward a greener planet.


Warning Signs: When Does Your Dryer Vent Need Cleaning?
Your dryer is trying to tell you something! Watch out for these signs:
Clothes are still damp after a full cycle – If your jeans are still wet after 45 minutes of drying, your vent probably needs attention.
Clothes are too hot to touch – When you open the dryer and the clothes are burning hot, it means the heat isn’t escaping properly through the vent.
Burning smell – This is serious! Lint might be burning inside the vent. Turn off the dryer immediately and clean the vent.
The dryer is hot on the outside – Touch the top or sides of your dryer. If it’s really hot, the vent is likely blocked.
Lint around the dryer door – More lint than usual around the door seal means it’s escaping because it can’t go through the vent.
It’s been more than a year – Even if everything seems fine, clean your vent at least once a year. Think of it like getting a haircut – regular maintenance prevents bigger problems!
The vent hood flap doesn’t open properly – Go outside and check the vent opening. The flap should open when the dryer is running. If it stays closed, there’s a blockage.
What You’ll Need: Shopping List for Dryer Vent Cleaning
Great news for shopping lovers! Here’s everything you need to buy for this project. Most items are affordable and available in any hardware store or online shopping platforms like Amazon, Flipkart, or your local Kirana store!
Essential Tools:
- Dryer Vent Cleaning Brush Kit (₹300-₹800)
- This is a long, flexible brush specifically designed for dryer vents
- Available on Amazon India or any hardware store
- Look for ones with extendable rods
- Vacuum Cleaner (if you already have one at home)
- Any vacuum with a hose attachment works
- If buying new, budget models start from ₹2,000
- Screwdriver Set (₹100-₹300)
- Both flat-head and Phillips head
- Essential for removing clamps
- Flashlight or Mobile Phone Light (Free!)
- To see inside dark spaces
- Microfiber Cloths (₹50-₹150 for a pack)
- For wiping and cleaning
- Safety Gloves (₹50-₹100)
- Protect your hands from sharp edges
- Face Mask (₹5-₹20)
- Prevents inhaling dust and lint
Optional but Helpful:
- Leaf Blower (if available) – Great for blowing out lint
- Cordless Drill with Lint Removal Attachment (₹1,500+) – For serious cleaning enthusiasts
- Measuring Tape (₹30-₹100) – To measure vent length
Total Budget: You can complete this entire project for ₹500-₹1,500 depending on what you already have at home!
Step-by-Step Guide: How to Clean Your Dryer Vent Like a Pro
Okay, time for the fun part! Follow these steps carefully, and you’ll be done in about 1-2 hours.
Step 1: Prepare Your Space
Unplug the dryer – Safety first! Always disconnect the power before working on any appliance. If it’s a gas dryer, turn off the gas valve too.
Move the dryer away from the wall – You’ll need space to work. Ask a friend for help – dryers are heavy! Slide it gently about 2-3 feet away from the wall.
Put on your safety gear – Gloves and mask on! You’re about to meet a lot of dust.
Step 2: Disconnect the Vent
Locate the vent connection – At the back of your dryer, you’ll see a large duct (usually silver or white) connected to the dryer with a metal clamp.
Remove the clamp – Use your screwdriver to loosen the clamp holding the vent to the dryer. Turn it counterclockwise. Keep the clamp safe – you’ll need it later!
Carefully pull off the vent – Gently wiggle and pull the vent duct away from the dryer. You might see lint immediately – that’s okay!
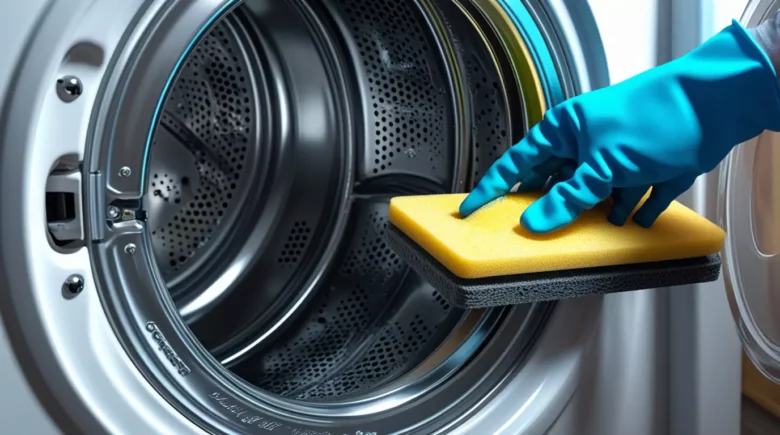
Step 3: Clean the Dryer Opening
Use your vacuum – Attach the hose to your vacuum and clean out the opening on the back of the dryer where the vent was connected.
Use the brush – Take your dryer vent brush and gently push it into the dryer opening. Twist and pull it back out. You’ll be surprised how much lint comes out!
Wipe it clean – Use a microfiber cloth to wipe away any remaining dust.
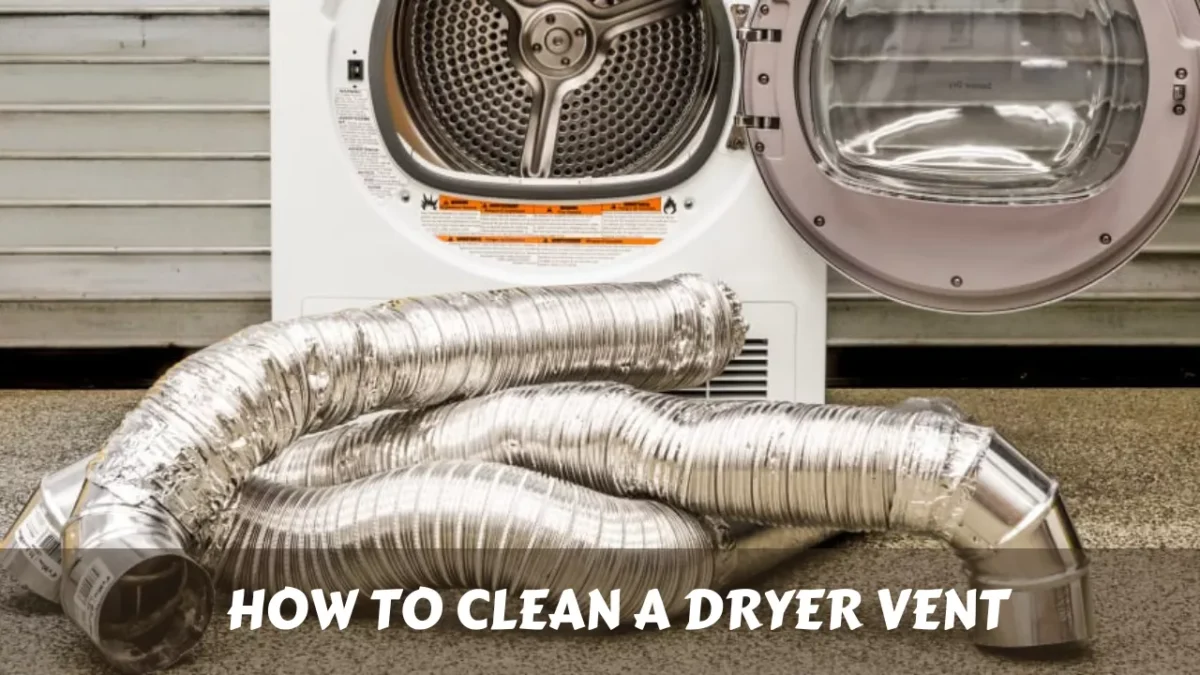
Step 4: Clean the Vent Duct
This is the main event! The vent duct is where most lint accumulates.
Insert the brush – Push your cleaning brush into the vent duct. If your brush has extendable rods, add them as you go deeper.
Twist and push – As you push the brush through, rotate it. This helps catch all the lint stuck to the sides. Push all the way through until you reach the outside vent opening.
Pull back slowly – Slowly pull the brush back while twisting. You’ll bring out tons of lint!
Repeat several times – Keep doing this until you’re not pulling out much lint anymore.
Vacuum the duct – Use your vacuum to suck out any remaining lint from both ends of the duct.
Pro tip: If you have a leaf blower, you can blow air through the duct from inside. This pushes lint out through the exterior vent. Just make sure someone is outside to catch the lint cloud!
Step 5: Clean the Exterior Vent
Go outside – Find where your dryer vent exits the building. It’s usually on an exterior wall and has a vent cover or hood.
Remove the cover – Some covers are held with screws, others just clip on. Remove it carefully.
Clean the opening – Use your brush and vacuum to clean this opening thoroughly. Check for any bird nests or debris (yes, birds sometimes nest here!).
Clean the cover – Wash the vent cover with soap and water. Make sure the flap moves freely.
Reattach the cover – Screw or clip it back on securely.
Step 6: Clean the Lint Trap
While you’re at it, give your lint trap some extra love!
Remove the lint trap – This is the screen inside your dryer door.
Remove visible lint – Pull off the layer of lint by hand.
Wash it – Run warm water over the screen. Use a soft brush (an old toothbrush works great!) with a drop of dish soap to clean both sides.
Let it dry completely – This is important! Never put a wet lint trap back in the dryer.
Check for residue – If you use dryer sheets, they can leave a waxy residue that blocks airflow. Hold the screen up to light – if you can’t see through it clearly, scrub it again.
Step 7: Reassemble Everything
Reconnect the vent duct – Attach the vent duct back to the dryer opening. Make sure it’s pushed on completely.
Secure with the clamp – Put the metal clamp back on and tighten it with your screwdriver. Make sure it’s snug but don’t overtighten.
Check the connection – Give the vent a gentle tug. It shouldn’t come off easily.
Push the dryer back – Carefully slide the dryer back into position. Make sure you don’t crush or kink the vent duct! Leave a few inches of space between the dryer and wall.
Plug it in – Reconnect the power (and gas if applicable).
Step 8: Test Your Work
Run a test cycle – Put a few damp towels in the dryer and run a normal cycle.
Go outside – While the dryer is running, check the exterior vent. You should feel strong airflow and see the vent flap opening properly.
Check for normal operation – Listen for unusual sounds. The dryer should run smoothly and quietly.
Feel the dryer – After 15 minutes, touch the dryer’s exterior. It should be warm but not too hot.
Congratulations! You’ve successfully cleaned your dryer vent! Give yourself a pat on the back – you just saved money and made your home safer!

How Often Should You Clean Your Dryer Vent?
Here’s a simple rule: Clean your dryer vent at least once a year. However, you might need to do it more often if:
- You have a large family and do laundry frequently
- You wash a lot of towels and blankets (they produce more lint)
- You have pets (pet hair creates extra lint)
- Your vent is very long or has many bends
- You notice any warning signs we mentioned earlier
Pro tip: Mark your calendar! Choose an easy-to-remember date like your birthday or the start of summer vacation. Set a reminder on your phone so you never forget.
Common Mistakes to Avoid (Learn from Others’ Errors!)
Mistake 1: Using flexible plastic or foil vents These are fire hazards! Always use rigid metal vent ducts. They’re safer and more efficient.
Mistake 2: Making the vent too long or bendy The shorter and straighter your vent, the better. Long, twisty vents accumulate more lint and reduce airflow.
Mistake 3: Forgetting the exterior vent Many people clean inside but ignore the outside opening. Both ends are equally important!
Mistake 4: Skipping the lint trap Clean your lint trap after every single load. This simple habit prevents most vent problems.
Mistake 5: Not seeking help for difficult situations If your vent goes through the roof or is very long and complicated, it’s okay to call a professional. Your safety matters most!
Special Tips for Students Living in Hostels or PG Accommodations
If you’re using a shared dryer in your hostel or PG, you might not have permission to fully disassemble and clean the vent. Here’s what you can do:
- Always clean the lint trap – Do this before every use. Other people might forget, so you’re helping everyone!
- Report problems to management – If you notice warning signs, inform your hostel warden or PG owner immediately.
- Check the exterior vent – If accessible, take a quick look outside to ensure it’s not blocked.
- Volunteer to help – Offer to assist with cleaning. Management will appreciate your initiative, and you’ll learn a valuable skill!
- Educate others – Share this knowledge with your roommates. Collective awareness keeps everyone safer.

DIY vs. Professional Cleaning: What Should You Choose?
Choose DIY cleaning when:
- The vent is short and easily accessible
- You have the time and tools
- You want to save money (professional cleaning costs ₹1,500-₹3,000)
- You enjoy hands-on learning
Call a professional when:
- The vent goes through the roof or multiple floors
- You haven’t cleaned it in several years
- There are structural complications
- You’re uncomfortable working with appliances
- You notice signs of damage or pests
Remember, there’s no shame in asking for professional help! Sometimes the best DIY decision is knowing when to call an expert.
Environmental Benefits: Why This Matters for India’s Future
As aware students, we should think about our environmental impact. Here’s how cleaning your dryer vent helps our planet:
Reduces energy consumption – A clean dryer uses 30% less energy. Multiply this by millions of households, and we’re talking about significant energy savings!
Lower carbon footprint – Less energy used means fewer carbon emissions from power plants.
Extends appliance life – Fewer dryers in landfills means less electronic waste.
Promotes sustainable living – Regular maintenance is more eco-friendly than frequent replacements.
India is working toward becoming a cleaner, greener nation. Every small action counts, and maintaining your dryer is one easy way to contribute!
Bonus Tips for Dryer Efficiency
Now that your vent is clean, here are extra tips to keep your dryer running perfectly:
- Dry similar fabrics together – Heavy towels and light t-shirts dry at different rates. Separating them makes drying more efficient.
- Don’t overload – Leave room for clothes to tumble freely. Overcrowding increases drying time.
- Shake out clothes – Before putting clothes in the dryer, shake them out. This prevents tangling and speeds up drying.
- Use dryer balls – Wool dryer balls (available online for ₹200-₹400) reduce drying time by improving air circulation.
- Clean the moisture sensor – Wipe the metal bars inside your dryer with rubbing alcohol monthly. This helps the auto-dry function work properly.
- Check the door seal – Make sure the rubber seal around the door is intact. Replace it if it’s torn or damaged.
Conclusion: You’re Now a Dryer Vent Expert!
Wow! You made it through the entire guide! You now know more about dryer vents than most adults. This knowledge will serve you throughout your life, whether you’re in a hostel, your first apartment, or eventually your own home.
Remember these key points:
- Clean your dryer vent at least once a year
- Watch for warning signs like longer drying times or burning smells
- Safety always comes first – unplug before cleaning
- Regular maintenance saves money and prevents fires
Cleaning your dryer vent isn’t just about laundry – it’s about taking responsibility, learning practical life skills, and keeping your home safe. These are the kinds of skills that make you more independent and confident.
So, what are you waiting for? Check your dryer vent today! And don’t forget to share this knowledge with your friends and family. You might just prevent a disaster or save someone hundreds of rupees on their electricity bill.
Happy cleaning, and may your clothes always dry perfectly! 🧺✨
Have questions about dryer vent cleaning? Tried these tips and want to share your experience? Remember, learning practical skills like this makes you smarter and more capable in real life – and that’s more valuable than any exam score!