Look, I get it.
You hop on a video call and you look like you’re broadcasting from a cave.
Everyone else looks professional whilst you’re squinting at shadows trying to figure out if that’s actually your face or some mysterious blob on screen.
Been there. Done that. Got the T-shirt.
The good news? Setting up home office lighting for video calls doesn’t require a film degree or breaking the bank.
I’ve spent way too much time figuring this out (so you don’t have to).
Why Your Current Setup Probably Sucks
Here’s what’s likely happening:
You’ve got your laptop on your kitchen table.
There’s a window behind you making you look like a witness protection programme participant.
The overhead light is casting shadows under your eyes like you’ve not slept in weeks.
Your colleagues are politely pretending they can see you whilst secretly wondering if you’re actually there.
Sound familiar?
The Golden Rule of Video Call Lighting
Put the light in front of your face.
That’s it.
Everything else is just details.
I learnt this the hard way after months of looking like I was conducting meetings from a dungeon.
What Actually Works
The best light source? A window.
But here’s the catch – it needs to be in front of you, not behind you.
I used to sit with my back to this massive window in my old flat.
Looked amazing for Instagram posts.
Terrible for video calls.
Everyone spent more time trying to work out what I looked like than listening to what I was saying.


Quick Wins: Transform Your Setup in 5 Minutes
Move Your Desk
First thing: Turn your desk 90 degrees.
If there’s a window in your room, position yourself so the light hits your face from the side or front.
Not from behind.
I can’t stress this enough.
Use What You’ve Already Got
Before buying anything, try this:
- Desk lamp: Point it towards the wall behind your screen, not directly at your face
- Table lamp with a shade: Perfect for soft, even lighting
- Phone torch: Sounds mental, but works in a pinch (I’ve done this more than I’d like to admit)
The Screen Brightness Trick
Turn your screen brightness up.
Seriously.
Your laptop screen acts like a massive light source.
Too bright and you’ll look like Casper.
Too dim and you’ll disappear into the shadows.
Find the sweet spot where your face looks natural.
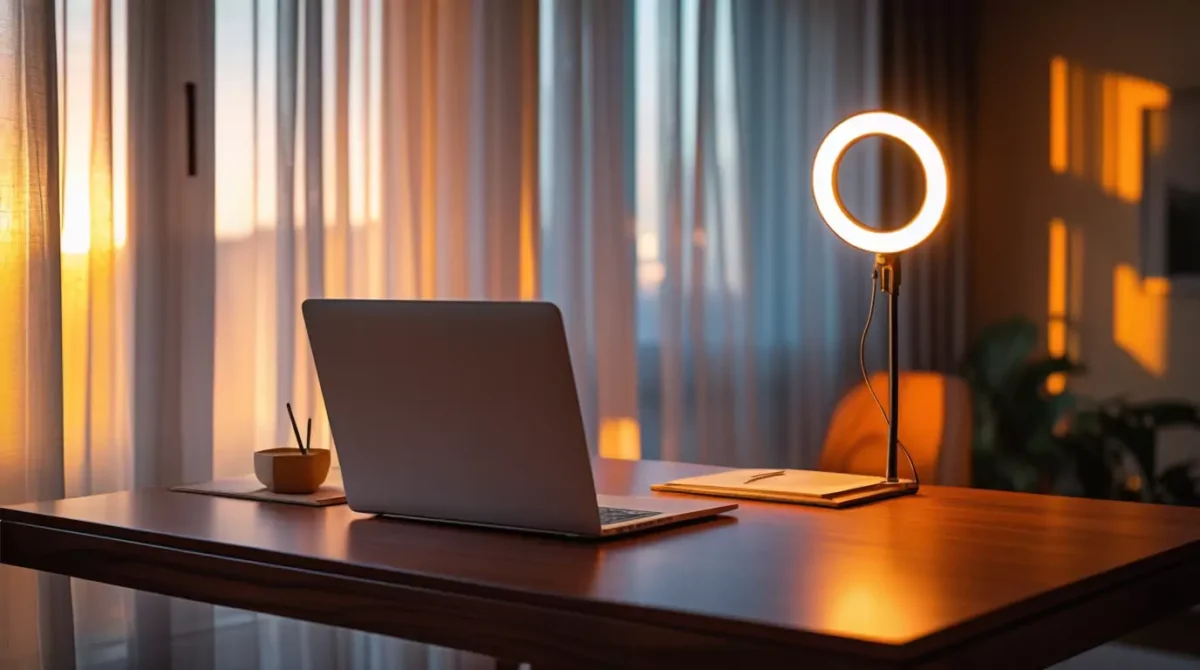
The Two-Light Setup That Changed Everything
This is where things get interesting.
I stumbled across this setup by accident when I had a lamp on one side and my window on the other.
Suddenly, I looked… professional.
Here’s What You Need:
Light #1 (Key Light):
- Position at a 45-degree angle to your face
- This should be your brightest light source
- A window or decent lamp works perfectly
Light #2 (Fill Light):
- Goes on the opposite side
- Should be dimmer than your key light
- Fills in the shadows from your main light
Why This Works
The key light shapes your face.
The fill light stops you looking like Two-Face from Batman.
Together, they make you look three-dimensional instead of flat.
I use this setup every day now.
Takes 30 seconds to arrange and makes a massive difference.
Common Mistakes That Make You Look Amateur
The Overhead Light Trap
Your ceiling light is not your friend.
It creates shadows under your eyes, nose, and chin.
Makes you look tired even when you’re not.
If you must use overhead lighting, add a front-facing light to balance it out.
The Ring Light Reflection
Ring lights are everywhere on social media.
But they create this weird sci-fi reflection in your eyes and glasses.
Makes you look like you’re about to probe someone for alien secrets.
If you use one, position it further back and slightly off-centre.
The “I’ll Fix It in Post” Mentality
Your video conferencing software isn’t magic.
No amount of digital touch-up can fix terrible lighting.
Get the basics right first, then worry about virtual backgrounds and filters.


Budget-Friendly Lighting Solutions
Under £20
LED desk lamp with adjustable brightness
- Look for ones with flexible arms
- Warm white light works best for video calls
- IKEA does decent ones that won’t break the bank
Under £50
Smart bulbs for existing lamps
- Adjust brightness and warmth from your phone
- Perfect for fine-tuning your setup
- Philips Hue are good, but supermarket brands work too
Under £100
Small LED panel light
- More control than desk lamps
- Often comes with stands
- Lume Cube Panel Mini is brilliant if you can stretch the budget
The Mobile Setup for Coffee Shop Warriors
Sometimes you’re not at home.
I travel quite a bit, so I’ve figured out the portable version.
Location Scouting
Look for:
- Tables near windows (but not directly in front)
- Spots where natural light hits from the side
- Areas without bright lights directly behind your seat
Avoid:
- Corners with no natural light
- Spots directly under ceiling lights
- Anywhere with busy backgrounds that’ll distract
The Portable Kit
I carry a small battery-powered LED light.
Sounds excessive, but it’s saved me more times than I can count.
Clips onto my laptop screen or sits on the table.
Makes the difference between looking professional and looking like I’m hiding something.
Advanced Setup: Three-Point Lighting
Once you’ve mastered two lights, you might want to try three.
This is proper broadcast-level stuff.
The Third Light (Back Light)
Goes behind you, out of frame.
Creates a subtle outline around your head and shoulders.
Separates you from the background.
Makes you look more three-dimensional.
But honestly?
Two lights will sort 95% of people out.
Don’t overcomplicate it unless you’re doing a lot of high-stakes video calls.

Technical Stuff That Actually Matters
Colour Temperature
This sounds fancy, but it’s simple.
Warm light = orange-ish (like candlelight) Cool light = blue-ish (like daylight)
The problem:
Mix warm and cool lights and you’ll look weird.
Either very orange or very blue.
The solution:
Stick to one type.
If you’re mixing with daylight from a window, go for bulbs around 6000K.
If it’s evening and no natural light, 2700K works better.
CRI (Colour Rendering Index)
This measures how accurately colours show up under your light.
Higher = better.
Look for CRI 90+ if you’re buying new lights.
Makes your skin tone look natural instead of sickly.
Software Settings That Help
Webex Features
If you’re using Webex:
- Use the preview feature before joining calls
- Adjust camera brightness manually for better control
- Match your virtual background to your actual lighting
General Tips
Most video conferencing platforms have brightness controls.
Use them.
But remember: software can only do so much with bad lighting.
Get the physical setup right first.
Room Setup Beyond Just Lights
Background Considerations
Your lighting affects how your background looks too.
Avoid:
- Bright windows in shot
- Cluttered, distracting backgrounds
- Blank white walls (makes you look washed out)
Go for:
- Bookshelves with some personality
- Artwork that reflects who you are
- Plants (everyone loves a good plant)
Desk Position
Eye level matters.
Your camera should be at eye level or slightly above.
Looking down at your laptop camera makes you look unprofessional.
And no amount of good lighting fixes a bad camera angle.
Troubleshooting Common Issues
“I Look Washed Out”
Your light is too bright or too close.
Move it back or dim it down.
“I’ve Got Weird Shadows”
You need a fill light on the opposite side.
Or your main light is at the wrong angle.
“My Glasses Keep Reflecting”
Angle your lights slightly downward.
Or move them further to the sides.
“Everything Looks Orange/Blue”
Your lights have different colour temperatures.
Use the same type of bulb in all your lamps.
The Investment Ladder
Starting Out (£0-20)
- Rearrange existing furniture
- Use window light properly
- Adjust screen brightness
- Point existing lamps correctly
Getting Serious (£20-100)
- LED desk lamp with adjustable settings
- Smart bulbs for existing fixtures
- Small LED panel light
Professional Level (£100+)
- Multiple LED panels
- Proper lighting stands
- High-CRI professional bulbs
- Full three-point setup
Most people never need to go beyond the middle tier.
I’ve seen brilliant setups using nothing but a £15 desk lamp and good positioning.
Maintenance and Consistency
Daily Routine
Before important calls:
- Check your preview
- Adjust screen brightness
- Make sure no new shadows have appeared
Seasonal Adjustments
Natural light changes throughout the year.
What works in summer might need tweaking in winter.
I keep notes on what settings work best for different times of day.
Equipment Care
LED bulbs last ages.
But they do dim over time.
If your setup starts looking different, check if your bulbs need replacing.
FAQs
Do I really need to spend money on lighting?
No. Start with what you have. Proper positioning beats expensive gear every time.
What’s the biggest mistake people make?
Putting their main light source behind them. It’s like trying to take a photo into the sun.
Ring light or LED panel?
LED panel. Ring lights create weird reflections and can wash out your features.
How do I know if my lighting is working?
Record a short video of yourself. If you can see your face clearly and you look natural, you’re sorted.
What about meetings at different times of day?
Natural light changes. Have backup artificial lighting for early morning or evening calls.
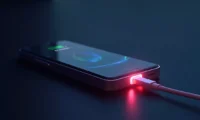
Can I use my phone’s torch?
In emergencies, yes. But it’s harsh and will drain your battery. Not ideal for long calls.
What if I wear glasses?
Angle your lights slightly to avoid reflections. Or move them further to the sides.
How bright should my setup be?
Bright enough that you can see your face clearly, but not so bright that you look washed out.
Do expensive cameras fix bad lighting?
No. A £1000 camera with bad lighting looks worse than a £50 webcam with good lighting.
What’s the minimum viable setup?
One decent light source in front of your face at a 45-degree angle. Everything else is bonus.
The Bottom Line
Home office lighting for video calls comes down to one thing:
Getting light on your face from the right direction.
Everything else is just optimisation.
I’ve seen people stress about expensive equipment whilst sitting with their backs to windows.
Don’t be that person.
Start with the basics.
Position yourself right.
Use what you have.
Then upgrade bit by bit if needed.
The goal isn’t to look like a news presenter.
It’s to look professional and engaged.
So your colleagues focus on what you’re saying, not trying to figure out what you look like.
Master your home office lighting for video calls, and you’ll never have to apologise for your setup again.