So your refrigerator ice dispenser chute door mechanism is acting up?
Trust me, I’ve been there.
You push the lever, ice comes out, but that little door just hangs there like it’s given up on life.
Or worse – it’s stuck shut and you’re getting zero ice.
Why Your Ice Dispenser Door Breaks (The Real Story)
Here’s what actually happens.
That little plastic door gets hit with ice cubes all day long.
Hot air from your kitchen flows in when the door’s open.
Cold air from the freezer flows out.
This constant temperature change makes the plastic expand and contract.
Eventually something gives.
Most common problems I see:
- Broken spring mechanism
- Warped plastic door
- Stuck pivot points
- Ice buildup blocking the door
- Worn out door gaskets
How to Fix Your Ice Dispenser Chute Door (Step by Step)
Step 1: Unplug Your Fridge
Safety first.
I don’t care if you’re just “taking a quick look.”
Unplug it.
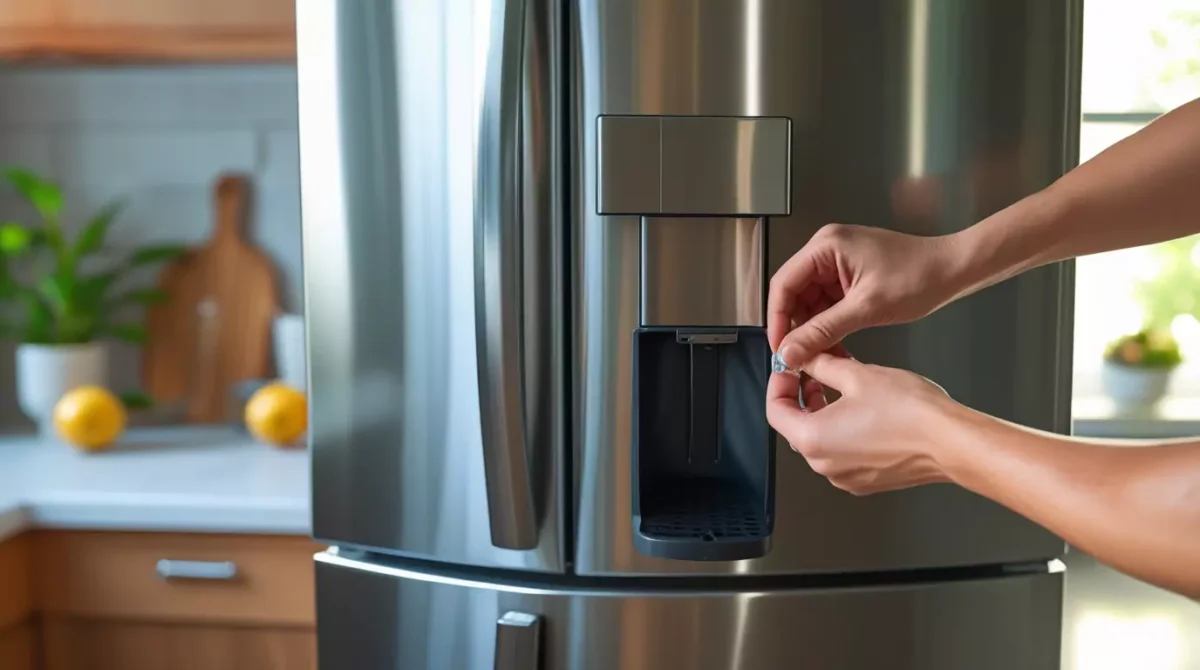
Step 2: Remove the Ice Dispenser Cover
Most covers pop off with gentle pressure.
Some have screws.
Check your manual if you’re stuck.
But honestly, most are pretty obvious once you look.
Step 3: Check for Ice Buildup
This is the easiest fix.
If ice is blocking your door, you’ll see it right away.
Here’s what to do:
- Use a hairdryer to melt the ice (keep it moving)
- Don’t use sharp objects to chip ice away
- Wipe everything dry when done
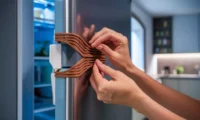
Step 4: Inspect the Door Spring
See that little spring mechanism?
That’s what pulls your door closed.
If it’s broken, stretched out, or missing – there’s your problem.
Springs cost like $5-15 on Amazon.
Just search your fridge model + “ice dispenser spring.”
Step 5: Check the Pivot Points
The door pivots on small plastic pins.
These wear out over time.
If they’re cracked or broken, the door won’t close properly.
Replacement pivot assemblies run $10-25.
Step 6: Test the Door Alignment
Sometimes the door just gets knocked out of alignment.
Gently adjust it back into place.
The door should sit flush when closed.

When to Call a Pro (And When Not To)
DIY if:
- It’s just ice buildup
- Spring looks obviously broken
- Door is clearly warped
- You can see the problem
Call someone if:
- Wires are involved
- You’re not comfortable with tools
- Multiple parts seem broken
- Your fridge is still under warranty
My $3 Ice Dispenser Fix That Actually Worked
Here’s a story for you.
My neighbor’s ice dispenser door wouldn’t close.
She was ready to call a repair guy.
I looked at it for 30 seconds.
The problem?
A tiny piece of ice was stuck in the hinge.
I used a credit card to pop it out.
Fixed.
Sometimes it really is that simple.
How to Prevent Future Problems
Clean your ice dispenser monthly:
- Wipe down the chute
- Check for ice buildup
- Clean the door gaskets
Don’t force anything:
- Let ice fall naturally
- Don’t jam glasses into the chute
- Be gentle with the lever
Watch for early warning signs:
- Door closing slowly
- Weird noises when dispensing
- Ice getting stuck
Common Mistakes People Make
Using hot water to melt ice.
Bad idea.
The temperature shock can crack plastic parts.
Forcing a stuck door.
You’ll just break more stuff.
Ignoring small problems.
That tiny gap will become a big gap.
Fix it early.
Replacement Parts: What You Actually Need
Most refrigerator ice dispenser chute door mechanisms use standard parts.
Common part numbers to look for:
- Door assembly
- Spring kit
- Pivot pins
- Door gasket
Check your fridge’s model number.
It’s usually on a sticker inside the main compartment.
Search “[Model Number] ice dispenser parts” and you’ll find what you need.
FAQ: Ice Dispenser Door Problems
How much does it cost to fix an ice dispenser door?
DIY fixes run $5-25 for parts. Professional repair is $150-300.
Can I still use my ice maker if the door won’t close?
Yes, but your ice will get stale faster and you’ll waste energy.
How long do ice dispenser doors last?
Usually 5-10 years depending on usage and quality.
Is it worth fixing or should I just disable the ice dispenser?
If your fridge is newer than 7 years, fix it. Older than that, you decide.
Can I replace just the door or do I need the whole assembly?
Usually just the door, but sometimes the whole chute assembly needs replacement.


The Bottom Line on Ice Dispenser Repairs
Look, your refrigerator ice dispenser chute door mechanism isn’t rocket science.
Most problems are simple fixes.
Check for ice buildup first.
Then look at the obvious stuff – springs, hinges, alignment.
Don’t overthink it.
And don’t let repair companies scare you into expensive fixes for simple problems.
You got this.Retry