Your toilet seat keeps sliding around like it’s trying to escape.
The lid won’t stay up.
And every time someone sits down, there’s that annoying wobble that makes you question your DIY skills.
I get it.
Last month, I walked into my guest bathroom and found the toilet seat hanging sideways like a broken wing.
My mother-in-law was visiting.
Not exactly the impression I wanted to make.
Why Toilet Seat Hinges Break (And Why It’s Not Your Fault)
Here’s the thing nobody tells you.
Those little plastic pins inside your toilet seat hinges are basically designed to fail.
They’re made of cheap plastic that gets brittle over time.
Add in some bathroom humidity, daily use, and the occasional slam from your teenager, and you’ve got a recipe for hinge failure.
Most common reasons hinges break:
- Plastic pins crack from temperature changes
- Metal hinges rust and seize up
- Over-tightening during installation
- Normal wear and tear (they’re not built to last forever)
The good news?
You don’t need to replace the entire toilet seat.
What You’ll Need for Hinge Pin Replacement
Before we dive in, grab these tools.
Trust me, having everything ready saves you three trips to the garage mid-project.
Essential tools:
- Screwdriver (flathead and Phillips)
- Pliers (needle-nose work best)
- New hinge pins or complete hinge kit
- WD-40 or similar penetrating oil
- Rag or paper towels
Optional but helpful:
- Flashlight (bathroom lighting is terrible for detail work)
- Rubber gloves (keeps your hands clean)


Step-by-Step Hinge Pin Replacement Guide
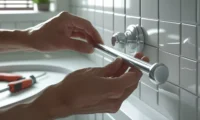
Step 1: Remove the Toilet Seat
First things first.
You need to get that seat off the toilet.
Look underneath the toilet bowl where the seat attaches.
You’ll see two bolts or plastic screws.
Quick removal tips:
- Turn counterclockwise (lefty loosey)
- If they’re stuck, spray with WD-40 and wait 10 minutes
- Some seats have quick-release buttons – press and lift
Pro tip: Take a photo before you remove anything.
You’ll thank me later when you’re trying to remember which way everything goes back together.
Step 2: Identify Your Hinge Type
Not all toilet seat hinges are created equal.
There are basically three types you’ll encounter:
Plastic hinges with removable pins
- Most common in budget toilet seats
- Pins slide out sideways
- Easy to replace
Metal hinges with threaded pins
- Found on higher-end seats
- Pins screw in and out
- More durable but harder to work with
Integrated plastic hinges
- Pin is molded into the hinge
- Can’t be replaced separately
- Need new hinge assembly
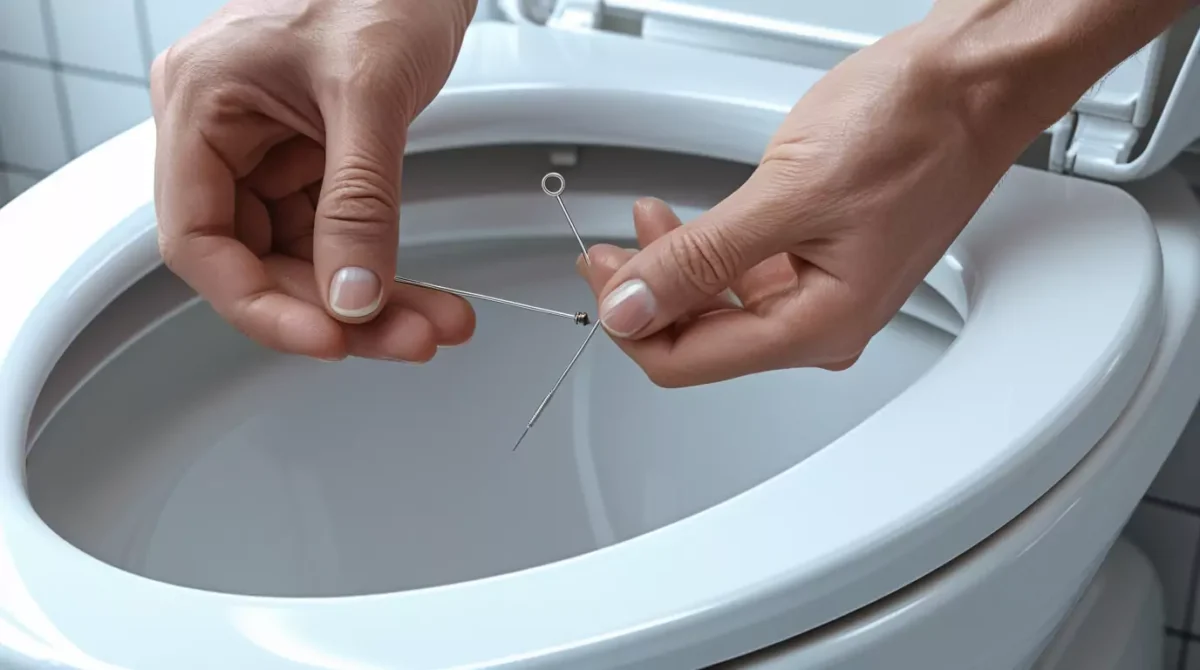
Step 3: Remove the Broken Hinge Pin
This is where patience pays off.
For removable pins:
- Look for a small tab or slot on the side of the hinge
- Use a flathead screwdriver to push the pin out
- Sometimes they slide, sometimes they pop out with pressure
For threaded pins:
- Grip the pin with pliers
- Turn counterclockwise to unscrew
- Go slow – old pins can break off
I learned this the hard way when I tried to rush through my first hinge repair.
Ended up with half a pin stuck in the hinge and a very creative vocabulary moment.
Step 4: Install the New Hinge Pin
Now for the satisfying part.
Installation process:
- Clean out any debris from the hinge hole
- Apply a tiny drop of oil to the new pin
- Insert the pin slowly and steadily
- Test the movement before fully seating
Common mistakes to avoid:
- Forcing the pin (if it doesn’t slide easy, something’s wrong)
- Installing upside down (yes, there’s usually a right way)
- Forgetting to test before reassembly
Step 5: Reassemble Your Toilet Seat
Almost home free.
Put everything back together in reverse order of how you took it apart.
(This is where that photo from Step 1 comes in handy.)
Reassembly checklist:
- Align the hinges with the toilet bowl holes
- Insert bolts from underneath
- Tighten until snug (not gorilla-tight)
- Test the seat and lid movement
When to Replace the Entire Hinge Assembly
Sometimes you can’t just replace the pin.
Here are the red flags that mean you need new hinges:
Replace if you see:
- Cracks in the hinge body
- Stripped screw holes
- Bent metal components
- Missing pieces (happens more than you’d think)
I once spent 45 minutes trying to fix a hinge that was cracked in three places.
Would’ve been faster to just buy a new hinge assembly from the start.
Choosing the Right Replacement Parts
Not all hinge pins are the same.
Shocking, I know.
What to look for:
- Measure your old pin (length and diameter)
- Match the material (plastic to plastic, metal to metal)
- Check the hinge brand if possible
- Bring the old pin to the hardware store
Most hardware stores carry universal replacement pins.
They work for 90% of common toilet seats.

Preventing Future Hinge Problems
An ounce of prevention, right?
Here’s how to make your toilet seat hinges last longer:
Monthly maintenance:
- Wipe down hinges with a damp cloth
- Check for loose bolts
- Apply a drop of oil to moving parts
Smart usage habits:
- Don’t slam the seat or lid
- Tighten bolts when they get loose
- Replace pins at first sign of wear
Environmental factors:
- Use bathroom ventilation to reduce humidity
- Keep cleaning chemicals away from hinges
- Check hinges after extreme temperature changes
Troubleshooting Common Issues
The Pin Won’t Stay In
Usually means the hinge hole is worn out.
Try a slightly larger pin or replace the hinge.
The Seat Still Wobbles
Check that both hinge pins are fully seated.
One loose pin makes the whole seat unstable.
The Lid Won’t Stay Up
This is often a pin that’s too tight or needs lubrication.
A tiny drop of oil usually fixes it.
Hinges Keep Breaking
You might have the wrong size pins or over-tightened bolts.
Double-check your measurements.
Cost Breakdown
Let’s talk numbers.
DIY replacement costs:
- Hinge pins: $2-5
- Complete hinge set: $8-15
- Tools (if needed): $10-20
Professional repair:
- Handyman call: $75-150
- Plumber visit: $100-200
Yeah, this is definitely a DIY job.
You’ll save 90% doing it yourself.
FAQs
How long do toilet seat hinge pins last?
Typically 3-5 years with normal use. Cheap plastic pins might only last 1-2 years.
Can I use any hinge pin as a replacement?
No, you need the right size and type. Measure your old pin first.
Why does my toilet seat keep coming loose?
Usually loose bolts or worn hinge pins. Check and tighten the mounting bolts first.
Is it worth fixing or should I buy a new toilet seat?
If the seat is otherwise good quality, fixing is worth it. But if it’s cheap and old, replacement might be better.
How do I know what brand my toilet seat is?
Check for markings on the underside of the seat or measure the bolt spacing.
Can I prevent hinge pins from breaking?
Yes – avoid slamming, keep bolts properly tightened, and do basic maintenance.
Final Thoughts
Look, fixing a broken toilet seat hinge pin replacement isn’t rocket science.
It’s one of those 20-minute projects that makes you feel like a home improvement hero.
Plus, you’ll never have to deal with a wobbly toilet seat again.
At least until the next hinge decides to give up.
But now you know exactly how to handle it.
So grab your tools, follow these steps, and get that toilet seat hinge pin replacement done right.