Your dishwasher is leaking water all over your kitchen floor again.
I get it.
You open the door and there’s that gross, moldy rubber thing around the edges looking like it’s seen better days.
Water pooling everywhere.
Your spouse giving you “the look.”
Here’s the thing – fixing a broken dishwasher door seal rubber gasket leak isn’t rocket science.
Why Your Dishwasher Door Seal is Leaking (And Why It Matters)
Let me tell you what happened to my neighbor Sarah last month.
She ignored her leaky door seal for weeks.
“It’s just a little water,” she said.
Fast forward – $3,000 in water damage to her hardwood floors.
Don’t be Sarah.
Common reasons your rubber gasket fails:
- Age (most last 5-7 years)
- Food buildup making it crusty
- Soap scum creating gaps
- Regular wear and tear
- Hard water deposits
Signs Your Door Seal Needs Attention Right Now
Look for these red flags:
- Water puddles after every wash
- Visible cracks or tears in the rubber
- Black mold spots (yuck)
- Door won’t close properly
- Musty smell coming from the dishwasher


Tools You’ll Need (Nothing Fancy)
Before we dive in, grab these:
- Screwdriver (usually Phillips head)
- Clean rags or towels
- Mild dish soap
- Old toothbrush
- Flashlight or phone light
- New door seal (if replacing)
Step-by-Step Fix for Your Leaking Door Seal
Step 1: Safety First (Don’t Skip This)
Turn off power to your dishwasher.
Unplug it or flip the breaker.
Water and electricity don’t play nice.
Step 2: Inspect the Current Seal
Open your dishwasher door completely.
Shine that light around the entire rubber gasket.
What you’re looking for:
- Cracks or splits
- Buildup of gunk
- Loose sections
- Missing pieces
Step 3: Clean Before You Replace
Sometimes the seal just needs a good cleaning.
Mix warm water with a few drops of dish soap.
Scrub gently with your toothbrush.
Pay special attention to the bottom where water pools.
Pro tip: Use a 50/50 white vinegar solution for stubborn buildup.
Step 4: Check if Cleaning Fixed It
Run a short cycle.
Watch for leaks.
If it’s still leaking, you need a new seal.
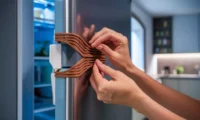
How to Replace a Dishwasher Door Seal
Finding the Right Replacement Part
Don’t guess on this one.
Check your dishwasher model number (usually inside the door frame).
Order the exact replacement from:
- Manufacturer website
- Appliance parts stores
- Amazon (make sure it matches your model)
Installation Process
Remove the old seal:
Most seals have a retaining band or clips.
Carefully remove these with your screwdriver.
Pull the old rubber gasket out.
Take a photo before removing – you’ll thank me later.
Install the new seal:
Start at the top and work your way around.
Make sure it sits in the groove properly.
Don’t stretch it too much.
Reinstall the retaining clips.
When to Call a Professional
Look, I’m all about DIY.
But sometimes you need backup.
Call a pro if:
- You can’t find the right replacement part
- The door frame is damaged
- Multiple seals are failing
- You’re not comfortable with the repair
Preventing Future Door Seal Problems
Monthly maintenance routine:
- Wipe down the seal after heavy use
- Run an empty cycle with white vinegar monthly
- Check for food debris weekly
- Keep the door slightly open after cycles to air dry
Cost Breakdown (So You Know What to Expect)
DIY replacement:
- New door seal: $25-$75
- Your time: 1-2 hours
Professional repair:
- Parts + labor: $150-$300
The math is pretty simple here.
Common Mistakes That Make Things Worse
I’ve seen people mess this up in creative ways.
Don’t do these things:
- Using harsh chemicals on the rubber
- Forcing a seal that doesn’t fit
- Ignoring small leaks hoping they’ll go away
- Running the dishwasher without a proper seal
Alternative Solutions When Replacement Isn’t Possible
Sometimes you’re dealing with an older dishwasher where parts are hard to find.
Temporary fixes:
- Food-safe silicone sealant for small cracks
- Adjusting door alignment if that’s causing gaps
- Professional seal restoration services
These aren’t permanent solutions, but they can buy you time.
FAQs About Dishwasher Door Seal Repairs
How long do dishwasher door seals typically last?
Most rubber gaskets last 5-7 years with normal use. Hard water and heavy usage can shorten this.
Can I run my dishwasher with a damaged door seal?
Not recommended. You risk water damage to your floors and cabinets. Plus, your dishes won’t get as clean.
Why does my new door seal smell weird?
New rubber often has a manufacturing smell. Run a few empty cycles with baking soda to eliminate odors.
Is it worth fixing an old dishwasher’s door seal?
If your dishwasher is over 10 years old, consider the cost of repair versus replacement. Sometimes it makes more sense to upgrade.
How do I know if the problem is the seal or something else?
Check if water is coming from the door area specifically. If it’s leaking from underneath, you might have a different problem.
Can hard water damage door seals faster?
Yes, mineral deposits can make rubber seals brittle and crack sooner. Consider a water softener if this is a recurring issue.
The Bottom Line on Dishwasher Door Seal Repairs
Here’s what I want you to remember.
A leaking dishwasher door seal rubber gasket isn’t going to fix itself.
The longer you wait, the more expensive it gets.
Most people can handle this repair in an afternoon.
And if you can’t, at least you know what to tell the repair person.
Your kitchen floor will thank you.
Your wallet will thank you.
And you won’t have to deal with that annoying puddle of water every time you want clean dishes.