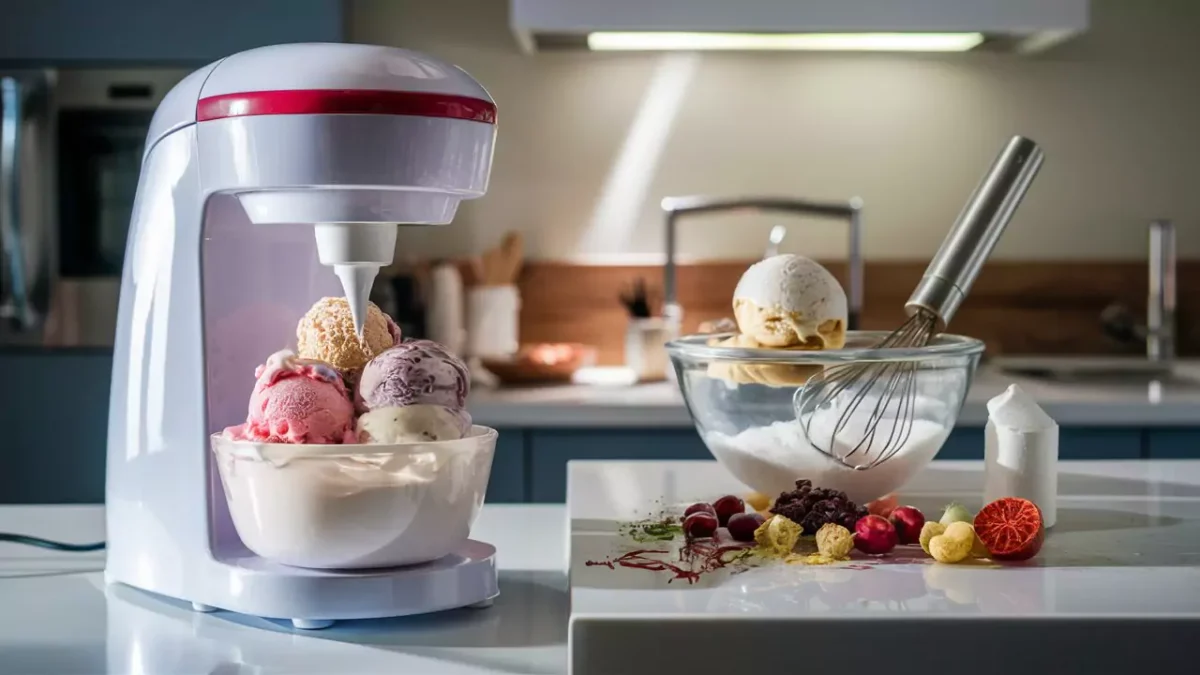
Electric ice cream makers produce creamier, smoother ice cream with professional texture due to constant churning, while no-churn ice cream offers unbeatable convenience with just mixing and freezing. Choose electric makers for superior texture and frequent use, or no-churn for simplicity, zero equipment cost, and occasional treats. Budget, kitchen space, and desired texture quality determine the winner for your needs.
The Homemade Ice Cream Dilemma
Love ice cream but confused which method gives better results? You’re not alone. As homemade desserts surge in popularity, thousands of home cooks face the same question: should I invest in an electric ice cream maker or stick with the trendy no-churn method?
The choice isn’t just about convenience—it affects texture, flavor intensity, time investment, and long-term costs. Whether you’re a parent seeking healthier treats for kids, a food enthusiast chasing restaurant-quality results, or someone craving occasional frozen desserts without buying new equipment, this guide breaks down everything you need to know.
You’ll discover which method produces creamier results, which saves money, which works better for dietary restrictions, and exactly how to choose based on your lifestyle.
Looking for the best ice cream makers? Check these top picks on Amazon → Electric Ice Cream Makers
Quick Comparison Table: Electric Ice Cream Maker vs No-Churn
| Factor | Electric Ice Cream Maker | No-Churn Ice Cream |
|---|---|---|
| Texture Quality | Smooth, creamy, minimal ice crystals | Denser, can be icy if not made properly |
| Time Required | 20–40 minutes active churning | 10 minutes prep + 6 hours freezing |
| Equipment Cost | $30–$500 depending on model | $0 (uses existing kitchen tools) |
| Skill Level | Beginner-friendly with instructions | Very easy, minimal technique |
| Batch Size | 1–2 quarts per batch | Flexible, limited by container size |
| Ease of Cleaning | Moderate (bowl, paddle, lid) | Minimal (just mixing bowls) |
| Consistency | Highly consistent results | Variable based on technique |
| Ingredient Flexibility | Wide variety of bases | Best with high-fat recipes |


What Is an Electric Ice Cream Maker and How Does It Work?

An electric ice cream maker is a countertop appliance that churns ice cream base while simultaneously freezing it, creating smooth, aerated frozen desserts. The machine uses a motorized paddle that constantly stirs the mixture as it freezes, preventing large ice crystals from forming and incorporating air for lighter texture.
There are two main types:
Freezer Bowl Models ($30–$80): Feature a pre-frozen insulated bowl containing freezing gel. You freeze the bowl 12–24 hours before use, then churn your ice cream base inside it. These are affordable and compact but require advance planning.
Compressor Models ($200–$500): Have built-in refrigeration systems, so no pre-freezing is needed. You can make multiple batches back-to-back, making them ideal for frequent use or entertaining.
The churning process typically takes 20–40 minutes and produces ice cream with professional-level texture due to continuous agitation that breaks up ice crystals and incorporates air (called “overrun” in ice cream terminology). The result is smoother, creamier, and more scoopable than most homemade alternatives.
Explore electric ice cream makers on Amazon →
What Is No-Churn Ice Cream and Why Is It So Popular?

No-churn ice cream is a simplified method that requires no special equipment or churning—just mixing, freezing, and waiting. The technique relies on whipped cream and sweetened condensed milk as the base, creating a creamy texture without mechanical agitation.
The basic formula is remarkably simple: whip heavy cream to stiff peaks, fold in sweetened condensed milk and flavorings, then freeze in a container for 6–8 hours. The condensed milk provides sweetness and prevents excessive ice crystal formation, while the whipped cream adds volume and creaminess.
This method exploded in popularity on social media because it requires only three core ingredients, takes about 10 minutes of hands-on time, and needs no expensive equipment. It’s perfect for spontaneous dessert cravings, apartment dwellers with limited counter space, and anyone intimidated by traditional ice cream making.
The flavor possibilities are endless—you can add cookie crumbles, fruit purees, chocolate chips, caramel swirls, or any mix-ins without worrying about machine limitations. However, the texture tends to be denser and slightly icier than churned ice cream, though many find this acceptable for the convenience trade-off.
Check top-rated mixing bowls →
Electric Ice Cream Maker vs No-Churn: Full Comparison (Texture, Speed, Cost & Flavor)
Which Method Gives Better Texture and Consistency?
Electric ice cream makers produce superior texture with smoother, creamier results and smaller ice crystals. The constant churning action breaks up ice crystals as they form while incorporating air that creates the characteristic light, scoopable texture you find in premium commercial ice creams.
No-churn ice cream tends to be denser and can develop larger ice crystals, especially if your freezer temperature fluctuates. Without agitation during freezing, water molecules bond into bigger crystals, creating a slightly grainier mouthfeel. That said, the high fat content from heavy cream and condensed milk helps minimize this effect.
The key difference is “overrun”—the amount of air incorporated into ice cream. Electric makers typically achieve 20–30% overrun, creating lighter texture, while no-churn ice cream has minimal overrun, resulting in denser, more intensely flavored scoops. Some people actually prefer the denser texture, finding it more indulgent.
Which One Is Faster for Making Homemade Ice Cream?
No-churn ice cream wins for total hands-off time, requiring only 10 minutes of active prep work versus 20–40 minutes of active churning for electric makers. However, no-churn needs 6–8 hours of freezing time before it’s ready to eat, while churned ice cream emerges from the machine in soft-serve consistency and only needs 2–4 hours to firm up.
If you count preparation, electric freezer bowl models require 12–24 hours to pre-freeze the bowl, though compressor models are ready instantly. For last-minute ice cream cravings, no-churn actually takes longer since you must wait overnight, while a compressor ice cream maker can deliver results in under an hour total.
The fastest option: compressor ice cream maker for immediate gratification, or no-churn made the night before for minimal hands-on effort.
Which Option Is More Budget-Friendly and Cost-Effective?
No-churn ice cream has zero equipment cost if you already own mixing bowls and a hand mixer or whisk. Even buying these tools costs under $30, making it the most budget-friendly entry point for homemade ice cream.
Electric ice cream makers range from $30 for basic freezer bowl models to $500+ for professional compressor units. However, the per-batch ingredient cost is similar for both methods—roughly $5–$8 for a quart of ice cream using eggs, cream, sugar, and flavorings.
For occasional ice cream makers (less than once monthly), no-churn offers better value. For frequent makers (weekly or more), an electric machine pays for itself in saved money versus premium store-bought ice cream, which costs $6–$10 per pint.
See affordable electric ice cream makers →
Which Method Offers Better Flavor Customization?
Both methods excel at flavor customization, but in different ways. No-churn ice cream makes it easier to add chunky mix-ins like cookies, candy pieces, and fruit since there’s no paddle to obstruct. Simply fold ingredients into the whipped mixture before freezing.
Electric ice cream makers handle smooth flavors better—chocolate, vanilla bean, coffee, fruit purees—and allow you to add mix-ins during the final minutes of churning for even distribution. The churning process can break down delicate ingredients like fresh berries, so timing matters.
No-churn particularly shines for layered creations—you can swirl in caramel, fudge, or jam without disrupting the freezing process. Electric makers excel at consistent flavor throughout and can produce smoother fruit-based sorbets and gelatos that no-churn struggles with.


Pros and Cons of Electric Ice Cream Makers

Pros:
- Professional-quality texture with smooth, creamy consistency and minimal ice crystals
- Consistent results every batch with precise control over churning time and texture
- Versatile for making gelato, sorbet, frozen yogurt, and dairy-free frozen desserts
- Compressor models allow multiple batches without waiting between uses
- Better for custard-based recipes that benefit from gradual freezing during churning
- Lower sugar recipes work well since churning prevents excessive ice crystal formation
Cons:
- Initial equipment investment ranging from $30 to $500 depending on model type
- Freezer bowl machines require 12–24 hours of advance bowl freezing before use
- Takes up counter or storage space, especially larger compressor ice cream maker units
- More components to clean including paddle, bowl, and lid after each batch
- Requires electricity and can be noisy during the 20–40 minute churning process
- Limited batch size per cycle, typically 1–2 quarts maximum capacity
Pros and Cons of No-Churn Ice Cream

Pros:
- Zero equipment cost if you own basic mixing bowls and a whisk or mixer
- Incredibly simple with only three base ingredients and 10 minutes active prep time
- No advance planning or pre-freezing equipment required before making ice cream
- Perfect for apartments or kitchens with limited counter and storage space
- Easy to customize with unlimited mix-ins, swirls, and flavor combinations
- Scales easily for larger gatherings by using multiple containers for different flavors
Cons:
- Denser texture with potential for larger ice crystals compared to churned varieties
- Requires 6–8 hours freezing time before ready to eat, needing advance planning
- Limited to high-fat recipes for best results, less versatile than electric makers
- Difficult to achieve smooth texture with sorbet or low-fat frozen desserts
- Results vary based on whipping technique, cream quality, and freezer temperature consistency
- Very sweet due to condensed milk base, hard to adjust sugar levels significantly
Which One Should YOU Choose? (Decision Guide)
For Busy Parents with Kids
Choose no-churn if your kids want ice cream spontaneously and you value minimal cleanup. The simple process lets children help safely, and you can prepare batches ahead for birthday parties without machine noise. However, choose an electric ice cream maker for home if you make ice cream weekly and want to control sugar content and ingredients more precisely for healthier treats.
For Complete Beginners with No Experience
Start with no-churn ice cream because it requires no technique mastery, timing precision, or equipment learning curve. You literally cannot mess it up if you follow the basic ratio. Once you’ve made it successfully several times and know you love homemade ice cream, consider upgrading to a countertop ice cream machine for better texture.
For Budget-Conscious Home Cooks
No-churn wins for minimal financial commitment, letting you experiment with homemade frozen desserts risk-free. If you later decide ice cream making is a regular hobby, invest in a mid-range freezer bowl machine around $50–$80, which offers good value without breaking the budget.
For Party Hosts and Entertainers
Electric ice cream makers with compressor functionality are essential if you host frequently and want to make multiple flavors in one session. You can churn three different batches in two hours, impossible with no-churn’s long freezing time or freezer bowl machines’ single-batch limitation.
For Flavor Experimenters and Creative Cooks
Both methods excel here, but no-churn edges ahead for textured mix-ins and dramatic swirls. You can create Pinterest-worthy layered creations with cookies, brownies, and candy without machine constraints. Electric makers are better for smooth experimental flavors like lavender honey or roasted strawberry puree.
For Texture Perfectionists and Quality Seekers
Electric ice cream makers are non-negotiable if you’re chasing smooth, professional ice cream texture. The churning process creates smaller ice crystals and proper overrun that no-churn simply cannot match. Invest in a quality stand mixer for ice cream preparation or a dedicated machine if texture matters most.
Ready to choose?


How to Make Ice Cream at Home (Both Methods Step-by-Step)

Making Ice Cream with an Electric Ice Cream Maker (10 Steps)
- Prepare your ice cream base by heating milk and cream with sugar until sugar dissolves completely, creating a smooth mixture without graininess.
- Temper eggs (if using custard base) by slowly adding hot cream mixture to beaten egg yolks while whisking constantly to prevent scrambling.
- Cook the custard over medium heat, stirring constantly until it reaches 170–175°F and coats the back of a spoon with a thin layer.
- Strain the mixture through a fine-mesh sieve into a clean bowl to remove any cooked egg bits and ensure smooth final texture.
- Chill the base thoroughly by covering and refrigerating for at least 4 hours or overnight until completely cold, as warm base won’t churn properly.
- Freeze the ice cream maker bowl for 12–24 hours if using a freezer bowl model, or skip this step with compressor machines.
- Set up your ice cream maker by placing the frozen bowl on the base, attaching the paddle, and ensuring everything locks securely.
- Turn on the machine and pour the chilled base through the opening while it’s running to prevent splashing and ensure even churning.
- Churn for 20–40 minutes until mixture thickens to soft-serve consistency, watching carefully to avoid over-churning which creates buttery texture.
- Transfer to container and freeze for 2–4 hours to firm up to scoopable consistency, pressing plastic wrap directly on surface to prevent ice crystals.
Making No-Churn Ice Cream (8 Steps)

- Chill your mixing bowl and beaters in the freezer for 15 minutes before starting, which helps cream whip faster and achieve better volume.
- Pour heavy cream into the chilled bowl and begin beating on medium speed, gradually increasing to high as it starts to thicken.
- Whip cream to stiff peaks, continuing until it holds its shape when beaters are lifted and doesn’t slide when bowl is tilted.
- Open sweetened condensed milk and add your flavorings like vanilla extract, cocoa powder, or fruit puree, stirring gently to combine evenly.
- Fold whipped cream into condensed milk mixture using a rubber spatula in gentle sweeping motions, being careful not to deflate the whipped cream.
- Add mix-ins during the last few folds such as chocolate chips, cookie pieces, or nuts, distributing them throughout without overmixing.
- Transfer mixture to a freezer-safe container, choosing a shallow container for faster freezing or deeper container for easier scooping later.
- Freeze for 6–8 hours or overnight until completely firm, covering surface with plastic wrap or parchment paper to prevent freezer burn and ice crystals.
Need supplies? Check out stainless steel mixing bowls and insulated freezer containers.
Building Your Ice Cream Knowledge: Related Topics
Expand your frozen dessert expertise with these related guides:
- Best Ice Cream Maker Recipes for Beginners – Start with foolproof vanilla, chocolate, and strawberry bases
- Best Kitchen Tools for Summer Entertaining – Essential gadgets for outdoor parties and gatherings
- Best Frozen Dessert Gadgets to Buy This Year – Reviews of popsicle molds, snow cone machines, and more
- How to Store Homemade Ice Cream Properly – Prevent ice crystals and maintain creamy texture
- Dairy-Free Ice Cream Guide – Making delicious frozen desserts without milk or cream
Frequently Asked Questions (FAQ)
Can I make ice cream without an ice cream maker or no-churn method?
Yes, you can use the bag method (shaking ice cream base in a sealed bag surrounded by ice and salt) or manual churning by stirring frozen mixture every 30 minutes, but these produce inferior texture compared to proper methods.
Why is my homemade ice cream icy and not creamy?
Ice crystals form when ice cream freezes too slowly, lacks sufficient fat content, or contains too much water. Use full-fat ingredients, freeze quickly, and churn properly to minimize ice crystal formation.
Can I use a stand mixer attachment instead of an ice cream maker?
Yes, KitchenAid and other brands offer ice cream maker attachments that work like freezer bowl machines. They’re excellent if you already own the stand mixer, offering good value without buying a separate appliance.
How much sugar is in no-churn ice cream compared to churned?
No-churn is typically sweeter because sweetened condensed milk contains significant sugar. One batch uses about 1 cup condensed milk with roughly 150g sugar, while churned ice cream recipes vary from 100–150g depending on preference.
Do electric ice cream makers use a lot of electricity?
Freezer bowl models use minimal electricity, typically under 10 watts for 30 minutes. Compressor models use more during operation (100–150 watts) but still cost only pennies per batch in electricity.
Can I halve or double no-churn ice cream recipes?
Yes, no-churn scales perfectly—just maintain the ratio of 2 cups whipped cream to 1 can (14 oz) sweetened condensed milk. Scale up or down while keeping this proportion for consistent results.
What’s the best way to scoop hard homemade ice cream?
Let ice cream sit at room temperature for 5–10 minutes before scooping, run your ice cream scoop under hot water between scoops, or use a sturdy metal scoop that conducts warmth from your hand to soften ice cream.
Can I make alcohol-infused ice cream at home?
Yes, but alcohol prevents freezing, so limit additions to 2–3 tablespoons per quart. Add during the last few minutes of churning or fold into no-churn mixture. Too much alcohol creates slushy texture instead of firm ice cream.
Why did my no-churn ice cream deflate after freezing?
This happens if cream was under-whipped, mixture was over-folded (deflating air bubbles), or ingredients were too warm when combined. Ensure stiff peaks and gentle folding for proper volume retention.
How do compressor ice cream makers work differently?
Compressor machines have built-in refrigeration systems that continuously cool while churning, eliminating the need for pre-frozen bowls. They’re essentially small freezers with churning mechanisms, allowing back-to-back batches without waiting.
Conclusion: Choose Your Perfect Ice Cream Method
The electric ice cream maker versus no-churn debate has no universal winner—your ideal choice depends entirely on priorities, budget, and lifestyle.

Choose an electric ice cream maker if you:
- Make ice cream frequently (monthly or more)
- Prioritize professional smooth, creamy texture
- Want to experiment with sorbets, gelato, and low-fat options
- Have counter space and budget for equipment
- Enjoy the process of proper ice cream making
Choose no-churn ice cream if you:
- Make frozen desserts occasionally or spontaneously
- Value simplicity and minimal cleanup
- Have limited kitchen space or budget
- Prefer dense, intensely flavored ice cream
- Want kid-friendly recipes with easy involvement
Many ice cream enthusiasts eventually use both methods—electric makers for special occasions requiring premium texture, and no-churn for quick weeknight treats. There’s no wrong choice, only the right method for your current needs.
Ready to make your decision? Start with no-churn to discover if you love homemade ice cream enough to invest in equipment, or dive straight into an electric maker if you’re confident about frequent use.