You’re staring at wedding quotes that make your savings account cry.
$15,000 for a reception venue?
$3,000 for “ambient lighting”?
That’s insane.
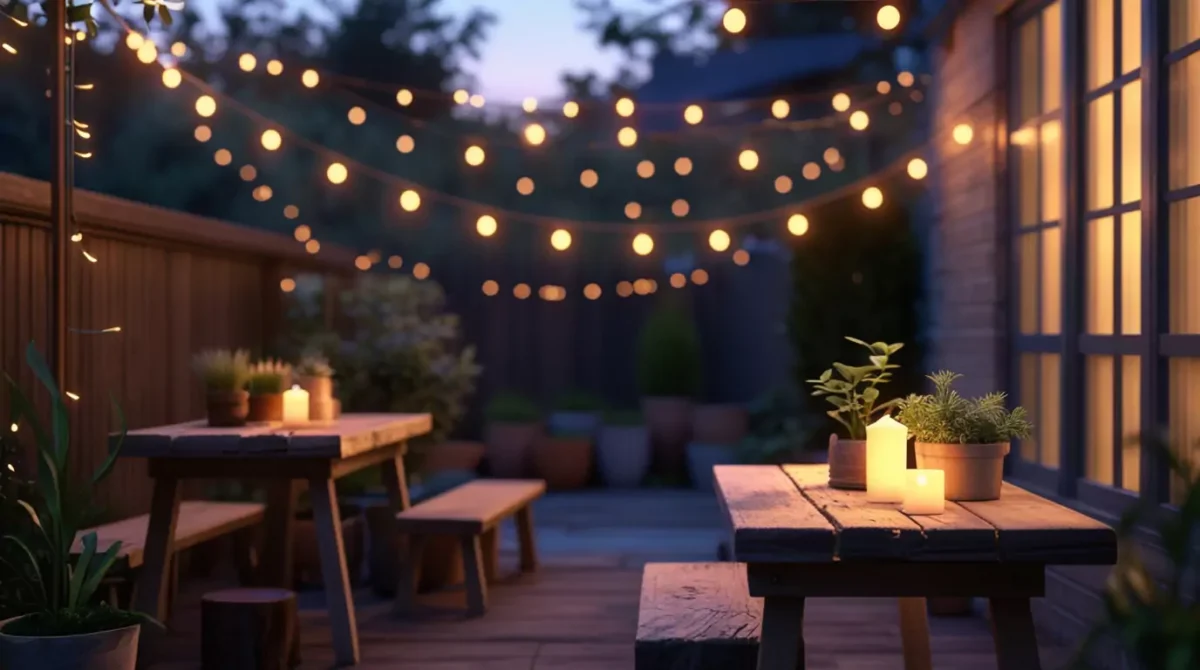
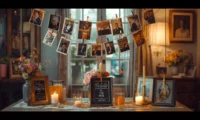
Here’s what nobody tells you: backyard string lighting can transform any space into wedding magic for under $500.
I’ve seen couples pull off stunning receptions that looked like they cost $20K.
They spent $400.
Why Your Backyard Beats Expensive Venues
Most people think backyard weddings look cheap.
They’re wrong.
Here’s why your backyard is actually better:
- No venue restrictions – Dance until 2am if you want
- Total creative control – Make it exactly how you want
- Massive cost savings – We’re talking 80% less than traditional venues
- Personal touch – Your guests will remember this forever
- Weather backup plan – You control the backup options
My friend Sarah spent $18,000 on her country club reception.
Her sister Lisa spent $800 on backyard string lights and mason jars.
Guess which photos went viral on Instagram?
Lisa’s.
The String Light Game Plan That Actually Works
Phase 1: Map Your Space Like a Pro
Walk your backyard at sunset.
Not during the day.
Sunset.
That’s when you’ll see how the shadows fall.
That’s when you’ll spot the dead zones.
What you’re looking for:
- Natural anchor points (trees, fence posts, house corners)
- Level ground for dancing
- Power source locations
- Areas that need extra light
Draw a simple sketch.
Mark your anchor points.
This 10-minute exercise will save you hours of frustration later.
Phase 2: Choose Your String Light Arsenal
Not all string lights are created equal.
Here’s what separates the pros from the amateurs:
LED vs Incandescent:
- LED lasts longer
- LED stays cool
- LED costs less to run
- Incandescent looks warmer
- Incandescent dims better
My recommendation?
Start with warm white LEDs.
2700K color temperature.
They give you that cozy cafe vibe without the fire hazard.
Length Planning:
- Measure twice, buy once
- Add 20% extra for sagging and connections
- Buy in 25-foot sections (easier to manage)

The $400 Complete Setup Shopping List
Here’s exactly what I bought for my cousin’s 100-person reception:
String Lights:
- 8 x 25ft warm white LED strings = $120
- 2 x 100ft heavy-duty extension cords = $40
- 1 x weatherproof power strip = $25
Support Structure:
- 10 x shepherd’s hooks (8ft tall) = $80
- 2 x tension cables (for long spans) = $30
- Cable ties and clips = $15
Extras That Make It Pop:
- 20 x mason jar luminaries = $40
- Battery-powered uplighting (4 units) = $50
Total: $400
That’s it.
No hidden fees.
No “coordination charges.”
No markup from wedding vendors.
Installation Day: The Step-by-Step Process
Morning Setup (4 hours before guests arrive)
Hour 1: Install Anchor Points
Plant your shepherd’s hooks first.
Space them 8-10 feet apart.
Push them down until only 6 feet shows above ground.
Pro tip: Water the ground first if it’s hard.
Hour 2: String the Perimeter
Start with your outer boundary lights.
Work clockwise around your space.
Keep about 2 feet of sag between anchor points.
Too tight looks sterile.
Too loose looks sloppy.
Hour 3: Create the Canopy
This is where the magic happens.
Run lights from your house to the far end of your yard.
Create a grid pattern about 8 feet off the ground.
Think of it as a ceiling made of light.
Hour 4: Add the Details
Place your mason jar luminaries around seating areas.
Set up battery uplighting behind key focal points.
Test everything twice.
Common Mistakes That Kill the Vibe
Mistake #1: Using Too Few Lights
I see this everywhere.
People buy 100 feet of lights for a 40×40 yard.
It looks sparse.
It looks cheap.
The fix: Use 3x more lights than you think you need.
Mistake #2: Installing Everything Too High
Your lights should create intimacy.
Not illuminate the neighborhood.
Keep your main canopy at 8-9 feet.
Lower accent lighting at 6-7 feet.
Mistake #3: Forgetting About Power
Extension cords snaking across your dance floor?
Amateur move.
Plan your power routing before you start hanging lights.
Use outdoor-rated cords.
Tape down anything that crosses walkways.
Mistake #4: No Backup Plan
What happens if it rains?
What if the power goes out?
Smart couples have:
- Battery backup lights ready
- Tent rental on speed dial
- Indoor backup location planned
Making It Look Expensive on a Budget
Here’s how to add $10,000 worth of perceived value for $100:
Trick #1: Layer Your Lighting
Don’t just hang string lights.
Mix in:
- Battery-powered lanterns
- LED candles in mason jars
- Solar pathway lights
- Uplighting behind plants
Trick #2: Create Zones
Separate your space into:
- Cocktail area
- Dining area
- Dancing area
- Quiet conversation spots
Each zone gets different lighting treatment.
Trick #3: Add Texture
Hang lights at different heights.
Drape some sections.
Create swags and curves.
Straight lines look like a parking lot.
Curves look like a fairy tale.
Weather-Proofing Your Light Setup
Rain Strategy
All your connections need to be:
- At least 6 inches off the ground
- Covered with weatherproof caps
- Using GFCI outlets
Pro tip: Wrap all connection points with electrical tape, then cover with plastic bags secured with zip ties.
Wind Strategy
Secure everything.
String lights become sails in high wind.
Use guy wires for long spans.
Have a takedown plan if weather turns nasty.
The Day-After Cleanup Strategy
Nobody talks about this.
You’ll be tired.
You’ll be hungover.
You’ll have 200 feet of tangled lights to deal with.
Smart cleanup process:
- Take photos while lights are still up (for next party)
- Remove lights before taking down supports
- Coil lights as you remove them
- Store in labeled bins
- Note what worked for next time
Frequently Asked Questions
How many string lights do I need for 50 guests?
Plan for 300-400 feet of string lights minimum.
That covers perimeter lighting plus overhead canopy.
Add another 100 feet for accent lighting.
Can I leave string lights up in winter?
Quality LED string lights handle weather fine.
The issue is UV damage over time.
If you’re keeping them up year-round, buy commercial-grade lights.
Expect to replace them every 2-3 years.
What if my yard doesn’t have trees for anchor points?
Shepherd’s hooks are your friend.
8-foot tall metal stakes work anywhere.
For long spans, use tension cables between two hooks.
Creates the same effect as trees.
How much does this save compared to renting a venue?
Average wedding venue: $8,000-$15,000 Professional lighting rental: $2,000-$5,000 Our backyard setup: $400-$800
You’re looking at 90% savings minimum.
Plus you keep all the equipment for future parties.
What’s the best time to hang string lights?
Two days before the wedding.
Gives you time to adjust and fix problems.
Don’t wait until day-of.
Murphy’s Law applies double to weddings.
Beyond Basic: Advanced String Light Tricks
Once you master the basics, here’s how to level up:
The Chandelier Effect
Create a focal point over your head table.
Gather 4-6 light strings to a central point.
Hang a decorative element (lantern, flowers) at the center.
Instant elegance.
The Waterfall Wall
Use a fence or house wall as backdrop.
Hang lights vertically in varying lengths.
Creates a curtain of light effect.
Perfect for photos.
The Dance Floor Dome
Circle your dance area with shepherd’s hooks.
Run lights from each post to a center point above the dance floor.
Creates an intimate dome of light.
Makes people want to dance.
Final Reality Check
Here’s the truth nobody tells you:
Your guests won’t remember the flowers.
They won’t remember the centerpieces.
They won’t remember the fancy linens.
They’ll remember the feeling.
Backyard string lighting creates a feeling that money can’t buy.
It says “we made this space special just for you.”
It says “we cared enough to transform our home.”
It says “this is about love, not showing off.”
The best weddings aren’t the most expensive ones.
They’re the ones where you can feel the love in every detail.
Backyard string lighting is your secret weapon for creating that magic without breaking the bank.
Your future self will thank you when you’re debt-free after your honeymoon.
Your guests will thank you for throwing a party they’ll never forget.
And your Instagram will thank you for the photos that look like they came from a $50,000 wedding.
All for the price of a nice dinner out.
That’s how you win.