Your garage door weather stripping looks like it got chewed up by a dog.
I get it.
Mine did too last winter.
Water was pooling inside my garage every time it rained.
My neighbor Jim thought I was running some kind of indoor car wash.
Why Your Weather Stripping Failed (And Why You Care)
Most weather stripping dies because of three things.
Age.
Weather.
And that time you backed into it with your lawnmower.
The rubber gets hard. Cracks appear. Gaps form.
Then your garage becomes a swimming pool every storm.
Signs Your Garage Door Seal Needs Replacement
Look for these red flags:
• Visible cracks or tears in the rubber • Water stains on your garage floor • Drafts coming under the door • Higher energy bills (your HVAC is working overtime) • Pests getting inside (mice love garage parties)
If you see any of these, it’s time to act.


What You’ll Need for Weather Stripping Replacement
Here’s your shopping list:
Tools:
• Screwdriver (Phillips and flathead) • Utility knife • Measuring tape • Pliers • Hacksaw (maybe)
Materials:
• New weather stripping (measure first!) • Screws (if the old ones are rusty) • Cleaning supplies
Pro tip: Measure twice, buy once.
I learned this the hard way when I had to make three trips to Home Depot.
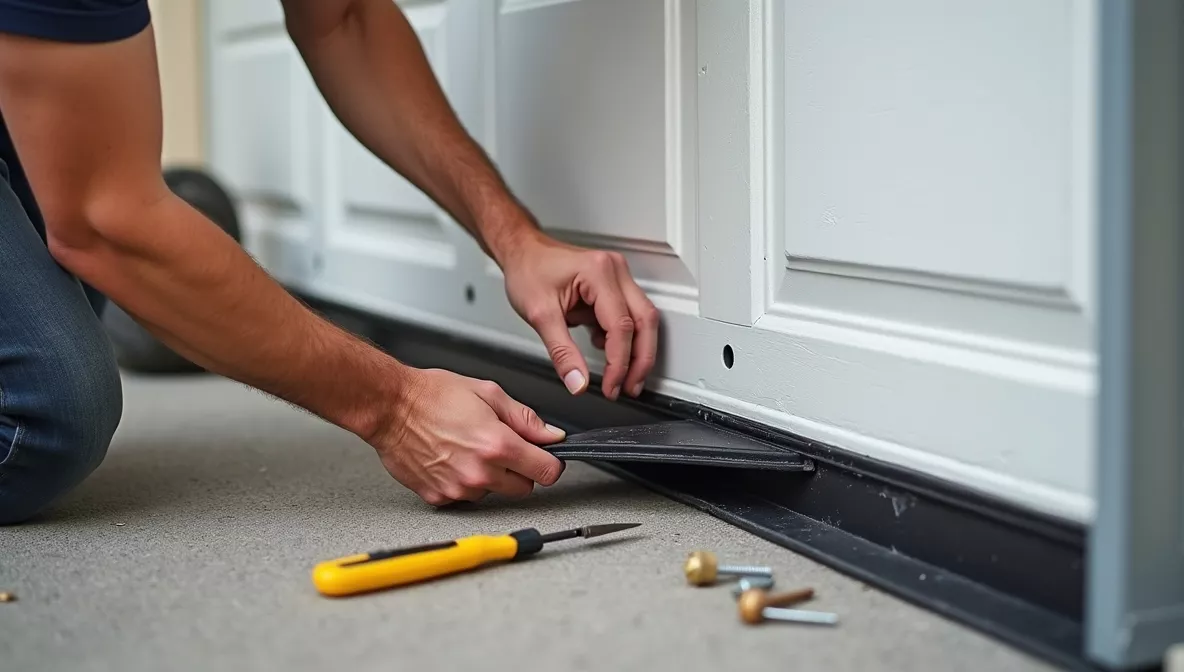
How to Replace Garage Door Weather Stripping (Step by Step)
Step 1: Remove the Old Seal
Start with the door closed.
Find the screws holding the old weather stripping. Remove them carefully. Don’t lose the screws in your driveway like I did.
Pull the old rubber seal out of its track.
Some pieces might be stubborn. Use pliers if needed. Clean out any debris from the track.
Step 2: Measure and Cut New Stripping
Measure the width of your garage door.
Add 2 inches for overlap.
Cut your new weather stripping to size.
Use a sharp utility knife. Make clean cuts. Jagged edges look unprofessional.
Step 3: Install the New Seal
This is where patience pays off.
Start at one end of the door. Insert the weather stripping into the track. Work your way across slowly.
The rubber should sit snug in the channel. No gaps. No bunching.
Step 4: Secure with Screws
Mark your screw holes.
Drill pilot holes if the material is thick.
Drive screws in firmly but don’t overtighten. You’ll crack the rubber.
Test the door operation. It should move smoothly.
Different Types of Garage Door Weather Seals
Bottom Seals
These sit at the bottom of your door. They take the most abuse. Replace them every 2-3 years.
Side Seals
Run along the vertical tracks. Less wear but equally important. Check them annually.
Top Seals
Often forgotten but crucial. Hot air rises and escapes here. Don’t skip this spot.


Common Weather Stripping Problems (And Quick Fixes)
Problem: New seal is too thick Fix: Check if you bought the right profile
Problem: Door won’t close properly Fix: Adjust the seal position or trim excess
Problem: Gaps at the corners Fix: Overlap the pieces slightly
Problem: Seal falls out of track Fix: Check for damage in the track itself
How Much Does Weather Stripping Replacement Cost?
DIY cost: $20-$80 depending on your door size.
Professional installation: $150-$300.
I saved $200 doing it myself.
It took me 2 hours including the Home Depot trips.
Your call.
When to Call a Professional
Some situations need expert help:
• Damaged door tracks • Bent door frames • Complex multi-section doors • You’re just not comfortable with tools
No shame in calling for backup.
I’ve seen too many weekend warriors create bigger problems.

Maintenance Tips to Make Your Weather Stripping Last
Keep it simple:
Monthly: Visual inspection for damage Quarterly: Clean debris from tracks Annually: Replace worn sections Every 3 years: Full replacement
Frequently Asked Questions
How often should I replace garage door weather stripping?
Every 2-3 years for bottom seals. Side and top seals last longer, around 5 years.
Depends on your climate and usage.
Can I use any weather stripping for my garage door?
No.
Different doors need different profiles. Check your door manual or take a sample to the store.
Why does my new weather stripping keep coming loose?
Usually means: • Wrong size/type • Damaged track • Incorrect installation
Double-check your work.
Is it normal for some air to get through?
A little bit, yes.
Perfect seals are impossible. But you shouldn’t feel strong drafts or see daylight.
Can I install weather stripping in winter?
Yes, but rubber is stiffer in cold weather. Let it warm up to room temperature first. Makes installation much easier.
How do I know if my garage door frame is damaged?
Look for: • Bent or warped sections • Rust or corrosion • Loose mounting hardware • Uneven gaps
Frame damage needs professional attention.
Final Thoughts on Garage Door Weather Stripping Replacement
Fixing broken garage door weather stripping seal replacement isn’t rocket science.
It’s a Saturday morning project that saves you money.
And keeps your garage dry.
Take your time. Measure carefully. Don’t overthink it.
Your future self will thank you when the next storm hits.